
 Where Do Mushrooms Grow – The Ultimate Guide
Learning how and where to grow mushrooms may seem like an uphill battle, but it’s more straightforward than you imagine. Most of the same insight applies whether you want to grow mushrooms in your backyard or as a commercial business.
Most of us grew up watching our parents or relatives picking carrots and tomatoes in the garden. Nonetheless, it’s still a rarity to see people growing mushrooms in the comfort of their homes.
Granted, the idea of growing mushrooms can be complicated and mysterious if you don’t have any prior experience. Nevertheless, don’t be intimidated by the thought. Once you grasp the fundamentals of the process, growing mushrooms is similar to that of other fruits and vegetables.
In this guide, we’ll walk you through the lifecycle of mushrooms, the types to grow, and where to grow them. Read on!
Growing Mushrooms On Small Farms or At Home
Mushrooms can be an excellent way of switching things up from the types of crops you grow on your small-scale farm or at home. A multitude of people has been growing mushrooms indoors for centuries. That’s as a result of their versatility coupled with the fact that they can be grown in various environments and small spaces.
You can grow them indoors, for instance, in a used basement or a spare room or outdoors alongside your vegetable garden. If growing mushrooms is something that’s been on your bucket list for a while, there’s no better time than now to get the ball rolling.
Even if you reside in an apartment, you have sufficient room to start growing nutritious and delicious mushrooms. There’s no messy soil to deal with, unlike generic crops, making mushrooms perfect for growing indoors.
The Life Cycle of Growing Mushrooms
Before we delve into the question, ‘where do mushrooms grow?’ it’s essential to first grasp the growing cycle. When most people think of mushrooms, they only know of the cap and stem that appears.
Only a few realize everything that goes into creating the mushrooms, including a complex network of mycelium that’s typically larger than those you see on the surface. Mycelium refers to a network of cells that are closely similar to a plant root system in appearance.
However, the only difference is that mycelium is more like mushrooms, and the plant represents its fruit. The sole purpose of mycelium is to keep its species going by growing mushrooms for reproduction and generating spores.
In the Wild
In nature, the life cycle of a mushroom ends in one way and kicks off in another concurrently. That kicks off when a mature mushroom sheds off its spores that are the fungi equivalent of seeds for a plant. Spores drop to the ground and mix with other compatible ones. It’s this process that leads to the growth of mycelium.
It’s worth noting that mycelium can be one organism or an array of organisms working as a colony. Once the mycelium has had an opportunity to grow, it’ll begin churning out pinheads. These are tiny bumps that grow into mushrooms after a while.
However, they first go through another phase known as primordia which resembles baby mushrooms. In the end, the primordia flourish into full-sized mushrooms that mature, shed their spores, and the cycle repeats.
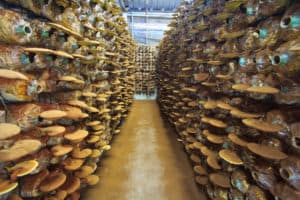
Cultivated Mushrooms
When growing mushrooms commercially, you largely mimic the same lifestyle they undergo in the wild but with a few major adjustments to optimize yield and other factors.
Stage 1: Mushroom Spawn
Growing mushrooms begins by acquiring spawn or spores. Spawn refers to any substance that has mycelium growing on it and is useful to speed up the process of mushroom growth. With spores or spawn, preparing a mushroom substrate can be a lifesaver as it serves as a surface on which mycelium can grow and flourish.
Mushrooms are usually referred to as the ‘fruit bodies’ of mycelium. Keep in mind that various mushroom species grow on different substrates. Oyster mushrooms and other aggressive types will thrive on coffee grounds, whereas others need wood to digest for energy.
Stage 2: Inoculation of Mushroom Substrate
As the next stage, inoculation entails introducing your mushroom spawn or spores to your substrate, also known as a growing medium. While it’s unnecessary, inoculation is usually done under sterile conditions to diminish the likelihood of mold or other fungi species from competing with the mushrooms you’re attempting to grow.
Stage 3: The Incubation Stage
After the inoculation of your substrate, the next course of action is incubation. It entails placing your substrate in a warm, dark environment for a few weeks or months. During this duration, your mycelium entirely colonizes your substrate. The result is a solid white mat of mycelium on the exterior of your substrate at the end of the process.
Stage 4: The Fruiting Phase
It entails placing your substrate into a fruiting environment after incubation. That typically entails slicing open the bag that was housing your substrate for exposure to fresh air. The substrate is misted with water throughout the day during the fruiting stage for moisture retention. After a few days, you’ll start seeing primordia (pinheads) forming on your substrate. After a while, they’ll grow into full-sized mushrooms.
Stage 5: Harvesting
The harvesting time of your mushrooms is based on the type. Typically, it entails gently twisting or drawing the mature mushroom caps away from the substrate on which they are growing. Some types of mushrooms can be harvested and grow back relatively fast. Each wave of new mushrooms is called a flush.
After exhausting each substrate, it stops generating mushrooms. As you continue reusing your initial mycelium to inoculate more batches of substrates, it eventually undergoes senescence. It’s the deterioration process that happens to all living things with age.
Therefore, it’s the equivalent of old age for mushrooms. The mycelium loses its ability and strength to divide and grow. Once your mycelium begins to show signs of weakness, you’ll require getting new spawn to grow from new spores.
Types of Mushrooms to Grow
There’s a wealth of mushroom species to grow. The main benefit of growing your mushrooms on a form or at home is that you won’t be growing a poisonous species, provided that you’re getting your spawn from a reputable source.
Given that distinguishing poisonous from healthy mushrooms in the wild can be an uphill battle, we’ll discuss the popular mushroom species that are a breeze to grow.
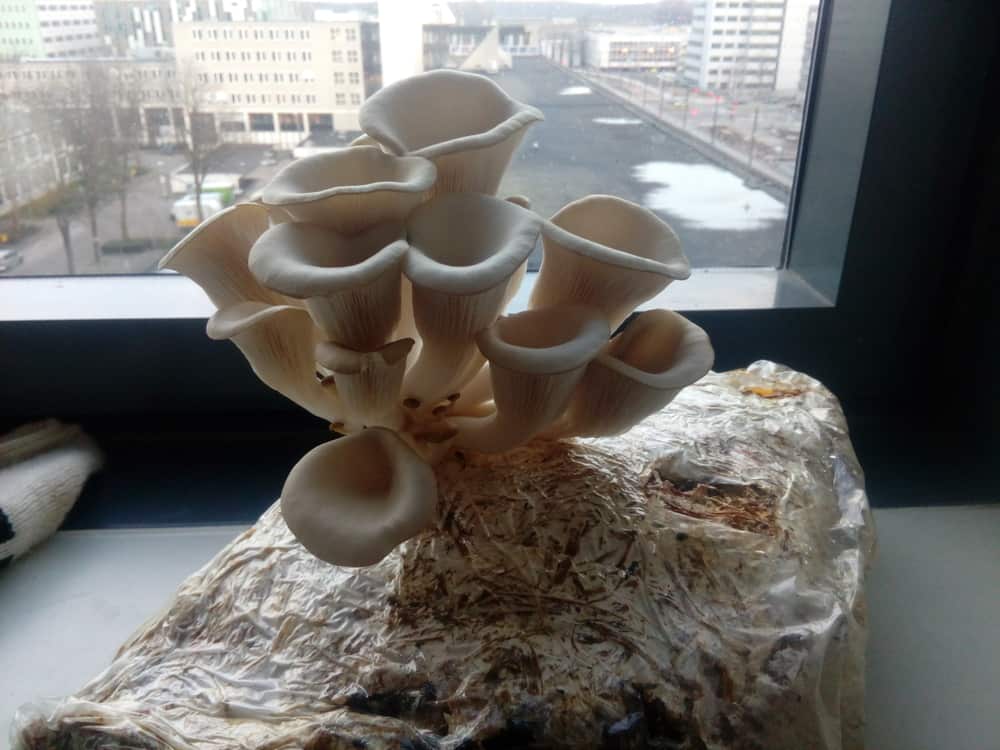
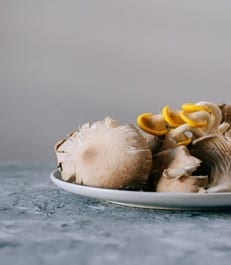
1. Oyster Mushrooms
These are some of the most renowned mushroom species across the globe, particularly in Asian countries. Oyster mushrooms are loved by beginners and pros alike. Furthermore, they grow on the side of trees in the wild and have a large flat cap with a small stem.
2. Portobello (Button) Mushrooms
These are common in nature, and there’s a high likelihood that you’ve eaten one in your life. While they are similar to other species, the growth duration of button (Portobello) mushrooms before harvesting sets them apart from the pack.
As they appear for the first time from mycelium, they closely resemble a button (explains the name). As they grow and become larger, Portobello mushrooms become ‘Baby Bella’ mushrooms. Once they grow fully, they develop a meaty and sturdier texture.
3. Shiitake Mushrooms
These have a texture that closely resembles Portobello mushrooms. Shiitake mushrooms are typically grown outdoors on logs and have a smoky, earthy flavor. Besides their burst of flavor that will keep you coming back for more, Shiitake mushrooms usher in numerous health benefits, such as reducing cholesterol levels. Additionally, although they are sold in a dried condition, you’re in for a real treat if you eat them fresh.
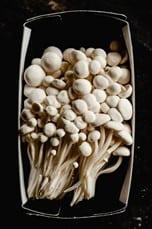
4. Enoki Mushrooms
These grow in a cluster and are characterized by tiny caps coupled with long stems. Without the caps, you’d mistake Enoki mushrooms for spaghetti. Due to their tiny size, Enoki mushrooms can be grown in jars as they demand minimal space to thrive.
5. Maitake Mushrooms
These are highly nutritious as they usher in numerous health benefits. Maitake mushrooms closely mimic a hen’s ruffled feathers, which is why they are popularly referred to as ‘hen of the woods.’ Nonetheless, this doesn’t apply to their taste. Maitake has a bold earthy flavor which is why we don’t recommend going through the process of growing without giving it a try.

Where to Grow Mushrooms Indoors
Growing mushrooms indoors is a convenient and easy way to grow your food quickly. With that being said, let’s answer the question, ‘where do mushrooms grow’ by discussing the various places you can grow them indoors and consume them as a meat substitute.
1. Using Mushroom Kits
If you’re a first-time mushroom grower, we recommend investing in a growing kit. A mushroom growing kit will be the Holy Grail for quick and easy growth. It includes a ready-made incubated and inoculated substrate to kick off the process.
Once you open the box, slice the bag, and infuse moisture into the substrate every day, you’re good to go. In 7 to 10 days, you’ll notice a boatload of tiny mushrooms growing on the substrate.
After the two-week mark, your mushrooms will be ready for harvesting, and you can reap the benefits of your labor, quite literally. By starting with a mushroom kit, you’ll understand the life cycle.
Furthermore, you’ll skip the difficult parts of preparation and other hurdles while making the mushroom substrate. The kit is also a foolproof way of achieving success in your first mushroom growth process.
2. Using a Tray
As we mentioned, button mushrooms are a commonality and easy to grow, which is why you may have eaten them countless times. While you can grow them indoors in a tray of any dimension, for instance, 10″ by 20″ or 14″ by 16″, it’s essential to use trays with a depth of 6 inches. Begin by getting manure, inoculate it with button mushroom spawn, and fill your tray with this substrate.
Keep the soil temperature around 21°C (70°F) by placing it on a heating pad for 21 to 25 days until mycelium appears. You’ll notice threadlike roots spreading across the soil. Once you notice mycelium, that’s your cue to cover it with potting soil for an inch and drop the temperature of the heating pad to anywhere between 12°C and 16°C (55°F to 60°F).
Now, retain the soil moisture by spraying water on it or covering it with a damp cloth and spraying it every two days to prevent it from drying. After 3 to 4 weeks, your button mushrooms should be ready for harvesting. To do so, use a sharp knife to cut the base. As a tip, refrain from pulling them from the soil as that will damage other mushrooms that are still growing.
Where to Grow Mushrooms Outdoors
While growing mushrooms indoors is safe, if you gravitate more towards growing them outdoors, you have free rein to do so. However, extra care will be required. Let’s discuss where you can grow mushrooms outdoors.
1. Logs
Various mushroom species such as Shiitake grow on trees and hardwood logs.
2. Mushroom Beds
You can grow mushrooms under a shady tree to prevent them from getting direct sunlight since most types prefer shade. Given that they don’t grow on garden soil, you’ll need to make a blend of fresh wood chips, straw, and compost as a substrate. Depending on the growing medium or substrate, you can decide on the mushroom species to grow.
A mushroom bed can be of any style whereby you can grow them on a raised timber bed just as you would other veggies or a simple garden bed. Regardless of your option, craft the bed from inoculated logs. Doing so will give your mushroom bed a neat, homely look while utilizing resources and space.
It’s worth noting that your bed should be about 4ft wide to make the harvesting process easier. Additionally, you should be aware of the spawn temperature required for growth and spreading. After all, the last thing you need is to waste your investment.
Conclusion
With insight into ‘where do mushrooms grow?’ you have free rein to grow them as a superfood for yourself and the members of your household or as a small-scale business. The world is your oyster!


